

To change the background color of the app icon in Flutter using Android Studio, follow these additional steps after configuring the Image Asset:
Step 0: Ensure Gradle Sync is Complete
• When you open the android folder in Android Studio, wait for Gradle to finish building.
• If it’s stuck, manually trigger it by clicking “Sync Project with Gradle Files” (in the top-right corner of Android Studio).
• You can also build the app once using:
flutter build apk• Once the build process is done, continue with the steps to open Resource Manager.
This step is crucial because without it, Resource Manager might not show the res folder correctly. Thanks for pointing it out! 🚀
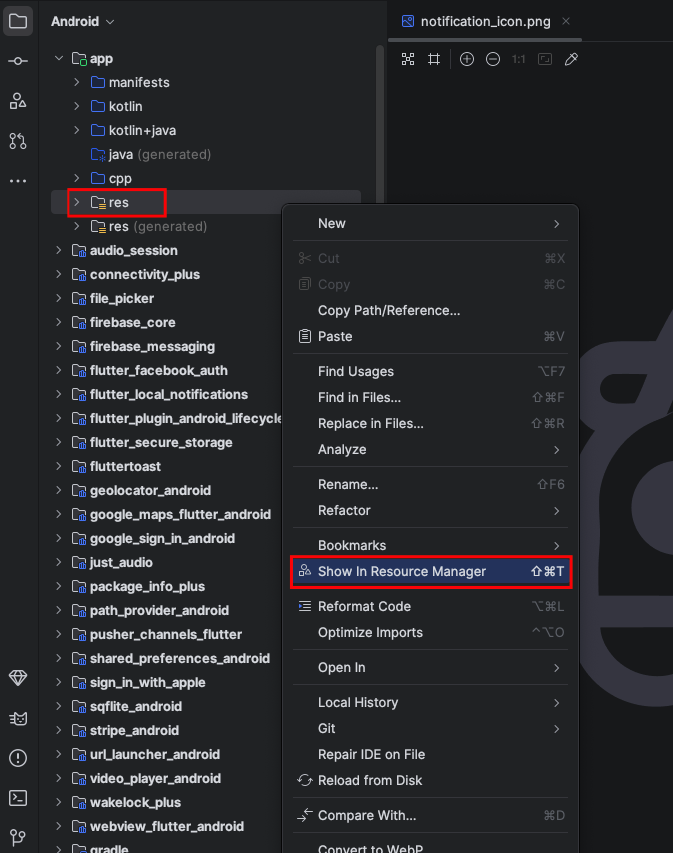
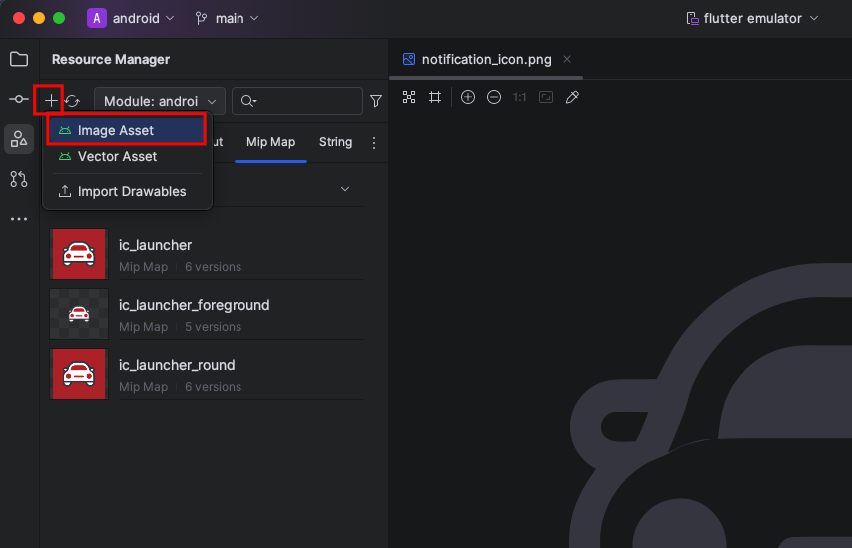
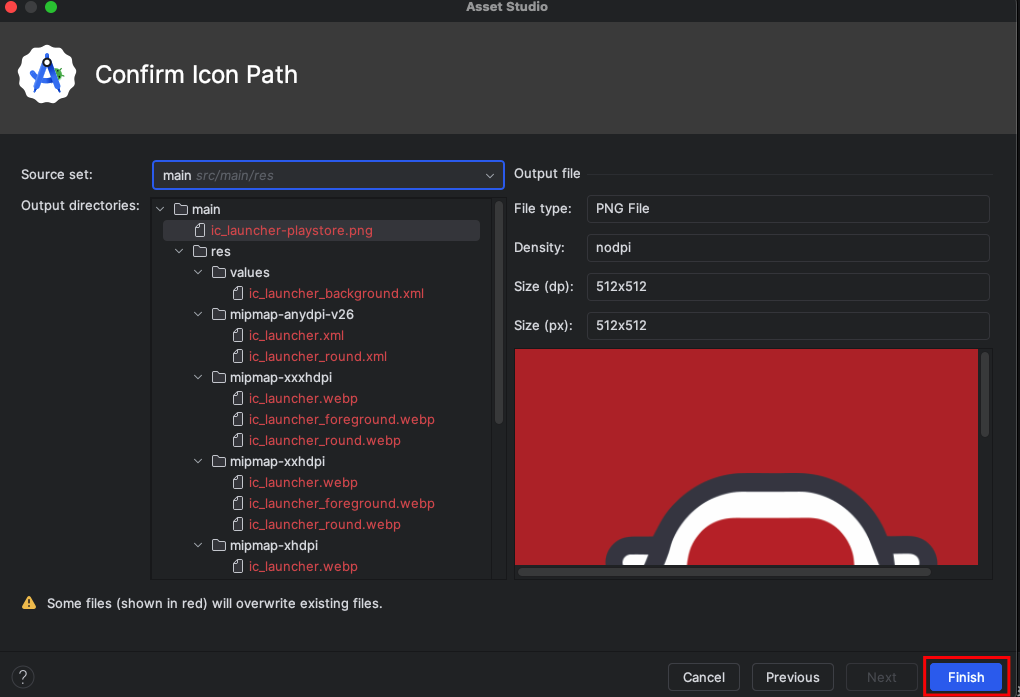
Step 1: Open Asset Studio
- Follow the previous steps to open Asset Studio (by selecting Image Asset in the Resource Manager).
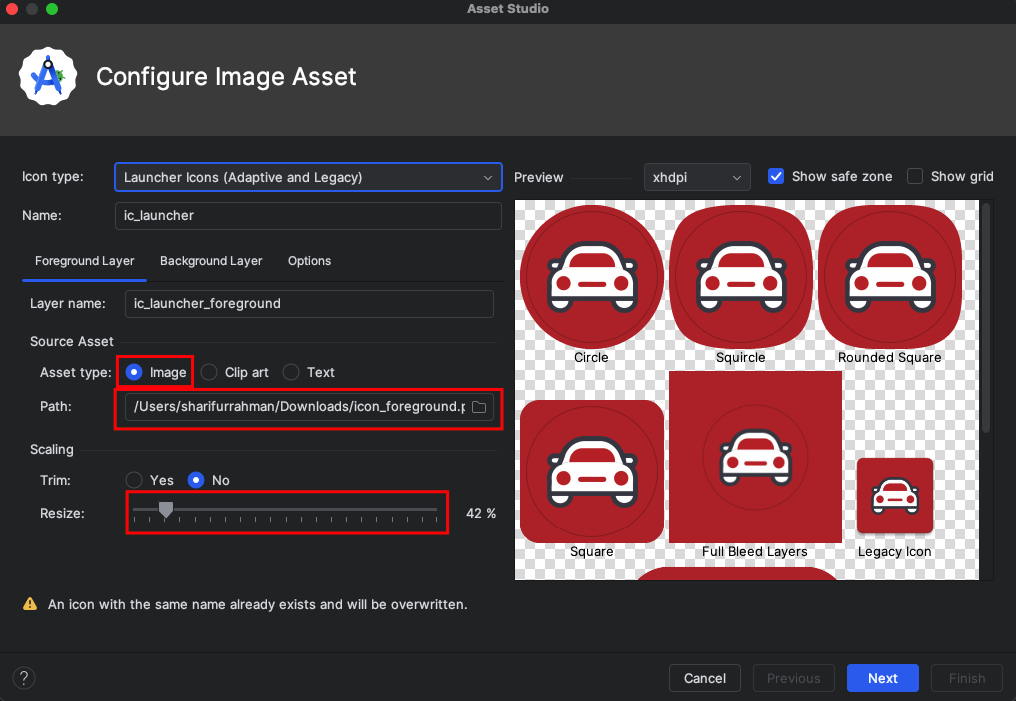
2. Ensure Icon Type is set to Launcher Icons (Adaptive and Legacy).
Step 2: Change the Background Colour
- Click on the Background Layer tab in the Configure Image Asset window.
- You will see a Colour Picker or an option to enter a HEX colour code.
- Choose your desired background colour.
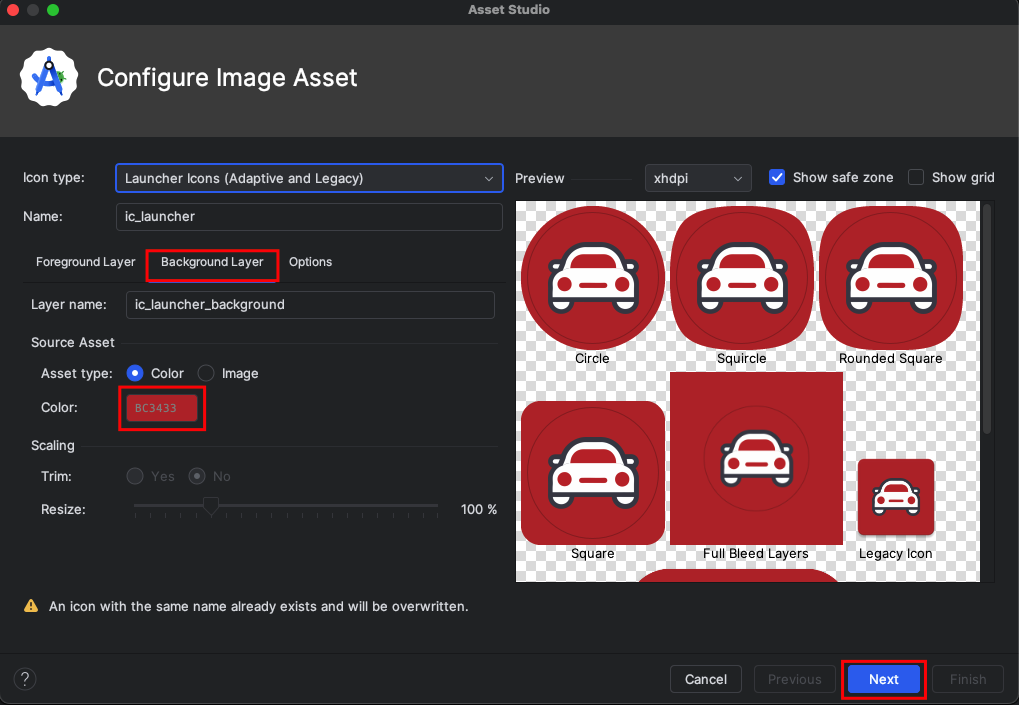
4. Click Next, then Finish.
Step 3: Rebuild and Run the Project
- Run the following command in the terminal:
flutter clean flutter pub get - Run the app to see the updated launcher icon with the new background colour.
Let me know if you need more details! 🚀
Step 4: Change the IOS Icon
- Replace the following image with your desired image-
assets/images/ios_ap_icon.png - Run the following command in the terminal:
flutter pub run flutter_launcher_icons - Run the app to see the updated launcher icon.
Step 5: Change Spash Image and Video
- Replace the following image with your desired image-
assets/images/splash.png. Make sure you give a transparent background to the image so that the video can be seen underneath of this image. - Replace the following video with your desired video
assets/files/splash_video.mp4 - Run the following command in the terminal:
flutter pub run flutter_launcher_icons - Run the app to see the updated launcher icon.