Here is a Sample Plugin with a Custom payment gateway implemented, you can explore it to understand how it actually work
https://github.com/xgenious-official/nazmart-plugin-sample
Create a module using this artisan command
php artisan module:make YourModuleNameAdd the module name in your modules_statuses.json file. The file is located in the core directory of the script.

In the modules_statuses.json file
{
    "Blog": true,
    "Service": true,
    "YourModuleName": true
}
modules_statuses.json file looks like this

You will get the module inside the Modules directory which you have just created. The Modules is located inside the core directory after the script root directory,

For more details about Module, you can check out this repository,
https://github.com/nWidart/laravel-modules

Add your custom sidebar menu in the admin panel
To add a custom menu, add this code to your module.json file. The module.json file is located inside the module you are dealing with,
"admin_settings": {
            "menu_item": [

            ]
       }
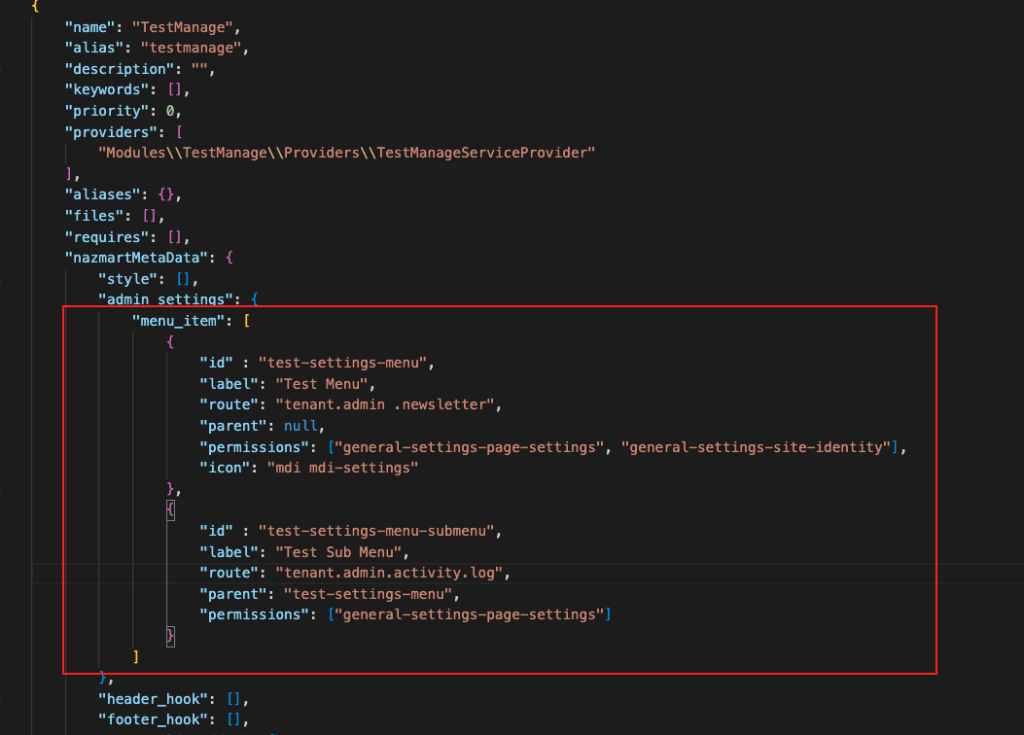
The module.json file looks like this,
{
    "name": "TestManage",
    "alias": "testmanage",
    "description": "",
    "keywords": [],
    "priority": 0,
    "providers": [
        "Modules\\TestManage\\Providers\\TestManageServiceProvider"
    ],
    "aliases": {},
    "files": [],
    "requires": [],
    "nazmartMetaData": {
        "style": [],
        "admin_settings": {
            "menu_item": [
                {
                    "id" : "test-settings-menu",
                    "label": "Test Menu",
                    "route": "tenant.admin .newsletter",
                    "parent": null,
                    "permissions": ["general-settings-page-settings", "general-settings-site-identity"],
                    "icon": "mdi mdi-settings"
                },
                {
                    "id" : "test-settings-menu-submenu",
                    "label": "Test Sub Menu",
                    "route": "tenant.admin.activity.log",
                    "parent": "test-settings-menu",
                    "permissions": ["general-settings-page-settings"]
                }
            ]
        },
        "header_hook": [],
        "footer_hook": [],
        "pageBuilderAddon": [
            "Modules\\TestManage\\Http\\PageBuilder\\Addons\\TestAddon"
        ],
        "widgetBuilderAddon": [
            "Modules\\TestManage\\Http\\WidgetBuilder\\Widgets\\FooterAbout"
        ],
        "paymentGateway": {
            "name": "AliPay",
            "slug": "alipay",
            "tenant": false,
            "chargeCustomerMethodNameSpace": "Modules\\TestManage\\Http\\Controllers\\TestManageController",
            "chargeCustomerMethodName": "paymentGateway",
            "test_mode" : false,
            "status" : true,
            "extraInfoMarkupBlade" : "ali_pay",
            "logo_file" : "ali-pay.png"
        }
    }
}
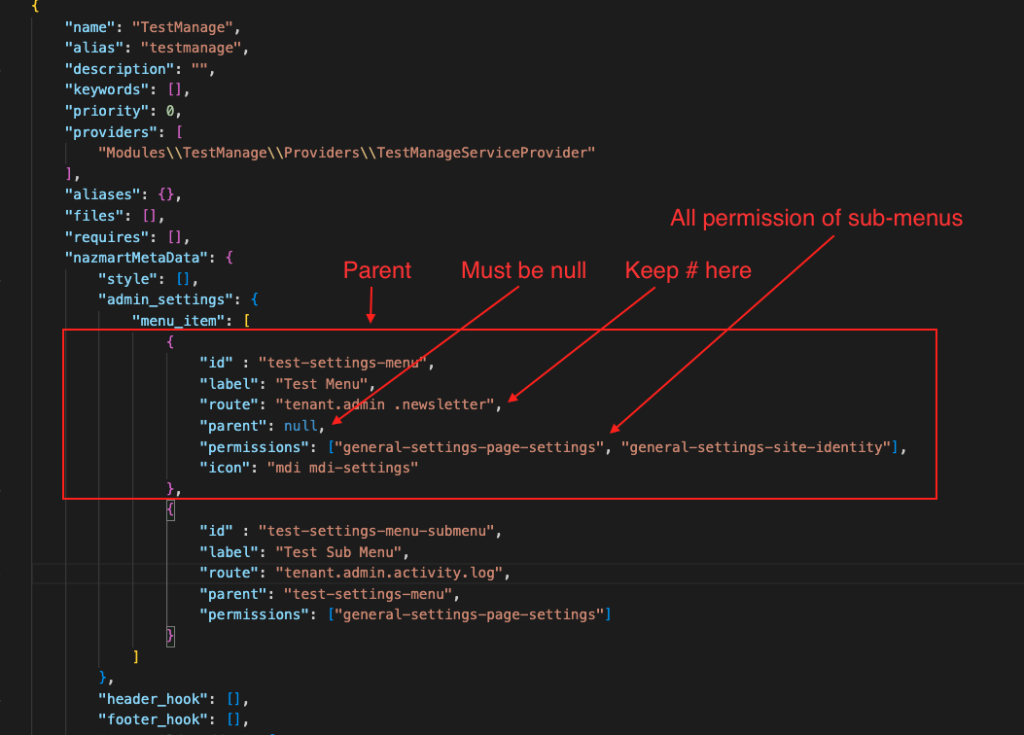
Add your menu id, label, route, permissions and icon in the menu_item,

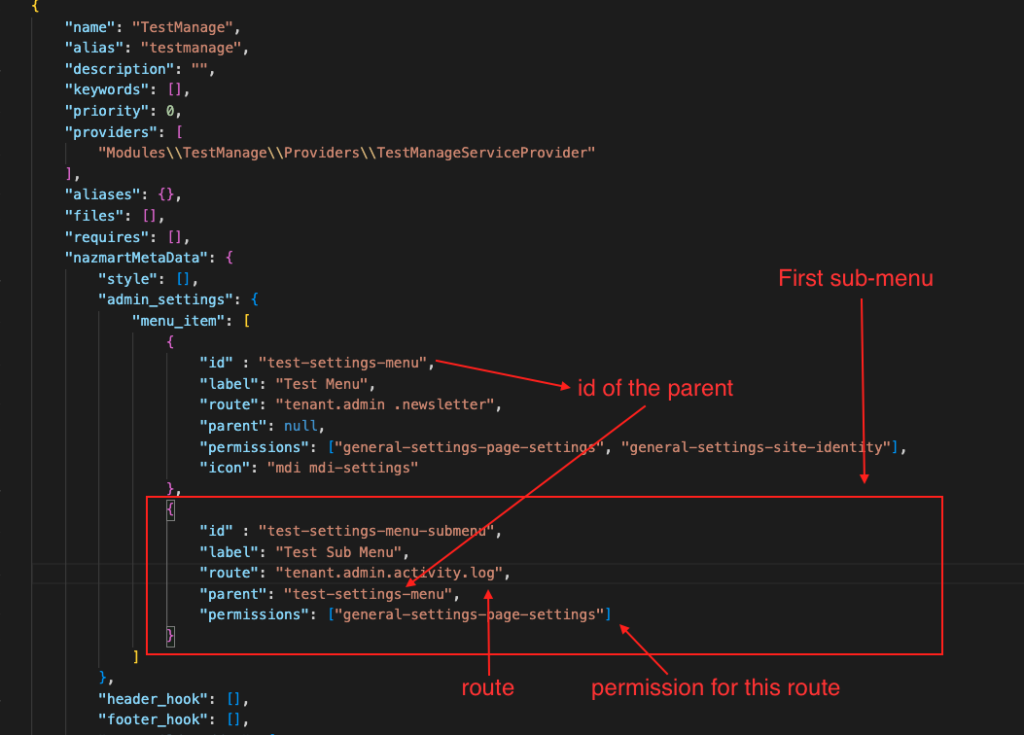
If you want to create a sub-menu follow the procedure,


